
Recently I found out about a Charity called Dress A Girl Around the World, and it stuck a cord with me. I have always wanted to do something to help disadvantaged children, but I just didn’t know what... I don’t know how to build, so there goes helping to build Schools and Churches. I have no Teaching Degree, so there goes teaching the Children. I’m not a Nurse or a Dr. I just didn’t have any skills to help these children, except my Christian Faith, My love for God and my heart for young Children. I have had on my heart for some time now that I needed to do something to help disadvantaged Children, especially Children from 3rd world countries, when I found out about this Charity; I knew it was from God! I know how to sew, and I suppose I am quite good at it, it is a skill that has been given to me by my Heavenly Father, so now I can do something with that skill to help these wonderful Girls!
So I got it in my head that I needed to organise a Sewing Bee to make Dresses for these Girls, I thought I might be able to get 5-6 Ladies together to help me sew up 20 or so dresses to donate to Dress a Girl Around the World - Sydney and Australia, so I posted on Gigi's Dress a Girl (DAG) Facebook page and a few other facebook pages. Created an event from my own facebook page, and shared it with everyone I knew, hoping to get donations of fabric and possibly some Dresses. A couple of Days later, a lovely lady called Karin, commented on my post and we got chatting, She was also very passionate about this cause and we decided that we should try to make this event REALLY work! Soon the 20 or so dresses that I wanted to make turned into 100 dresses, and now a few days later, that even seems like a too easy goal! Shall we go for 200? We have over 20 people attending our event so far, which is booked for the 24th of March 2012. We need to find a venue, and of course we need donations of fabric, and money to get this thing off the ground. We are looking into having a few fundraising events to pay for posting the dresses, fabric, cotton, bias, elastic, hire of a venue, tea and coffee for the sewer's and food for the sewer's.
We still would LOVE for people to sign up for the event, the more Dresses we make, the more smiles we will put on beautiful little girls faces.

So I have had a few people say they would like to make some dresses, but won’t be able to come to the event, they have asked for a pattern for the Pillow Case Dress, and I thought I would do one better and write a tutorial, now bare with me, I have never done a tutorial before! Please note, that this is the way that I make Pillow Case Dresses, if there is another way that you know of please feel free to do it your way!
What you need:
1. Standard Pillowcase or about a metre of fabric
2. Thread whose color more or less matches the pillowcase and/or fabric
3. 60" of bias tape or ribbon
4. Lace or other trims which you can use to embellish your dress but this is optional5. Sewing Machine
2. Thread whose color more or less matches the pillowcase and/or fabric
3. 60" of bias tape or ribbon
4. Lace or other trims which you can use to embellish your dress but this is optional5. Sewing Machine
6. Scissors or Rotary Trimmer
7. Iron and Ironing board
Length Guidelines:
I used the following length guidelines for the dress -
6 - 12 months 15"
2 yrs old 19"
3 yrs old 21"
4 yrs old 23"
5 yrs old 25"
6 yrs old 27"
And so on. I added 2" for each additional year
*Make sure you cut your fabric about 2" longer than you need to allow for hemming
Step 1:
Fold your fabric in half lengthways so that the selvages are touching. Cut your fabric to the desired length - I am making a 12 to 18 month’s size so I have cut the fabric at 19"

Step 2:
Unfold your fabric and cut down the middle to create two separate pieces.

Step 3:
Put both pieces together and fold in half lengthways again. Cut 2 J shapes for the Arm holes. Make them about 4" Long and 3" wide

Unfold the fabric and it should look like this

Step 4:
I now use an overlocker to tidy the edges.

If you don’t have an overlocker, you can just double up the fabric when you hem the dress.
Step 5:
Place the two pieces of fabric together, right sides facing, and sew or over lock the sides together
 | |
|

Step 6:
Now the binding: I have just used some pre-made bias binding I have bought from spotlight. Pin the bias binding open onto the right side of the fabric all the way around the arm hole.

And sew along the crease closest to the edge of the fabric


Sew over the bias binding again, closest to the edge of the bias binding

Step 7:
Make the casing for the ties: Fold over the top of the dress about 1 - 2 inches and press.

Sew a straight line along the edge to create the casing ( If you have not over locked your edges, you will need to press it so that the raw edge is enclosed in the casing - fold it about 1cm press then fold 1-2 inches and press again) Do this for both sides.
Step 8:
Fold up the hem about 1" and press. Sew the hem.

Step 9:
Now the main part of the dress is finished, you just need to make the straps.
I cut 2 pieces of fabric, the whole width of the fabric, 4 inches long. Fold in half and then press.

Sew the strap together

And turn the right way

I use a safety pin to do this. |
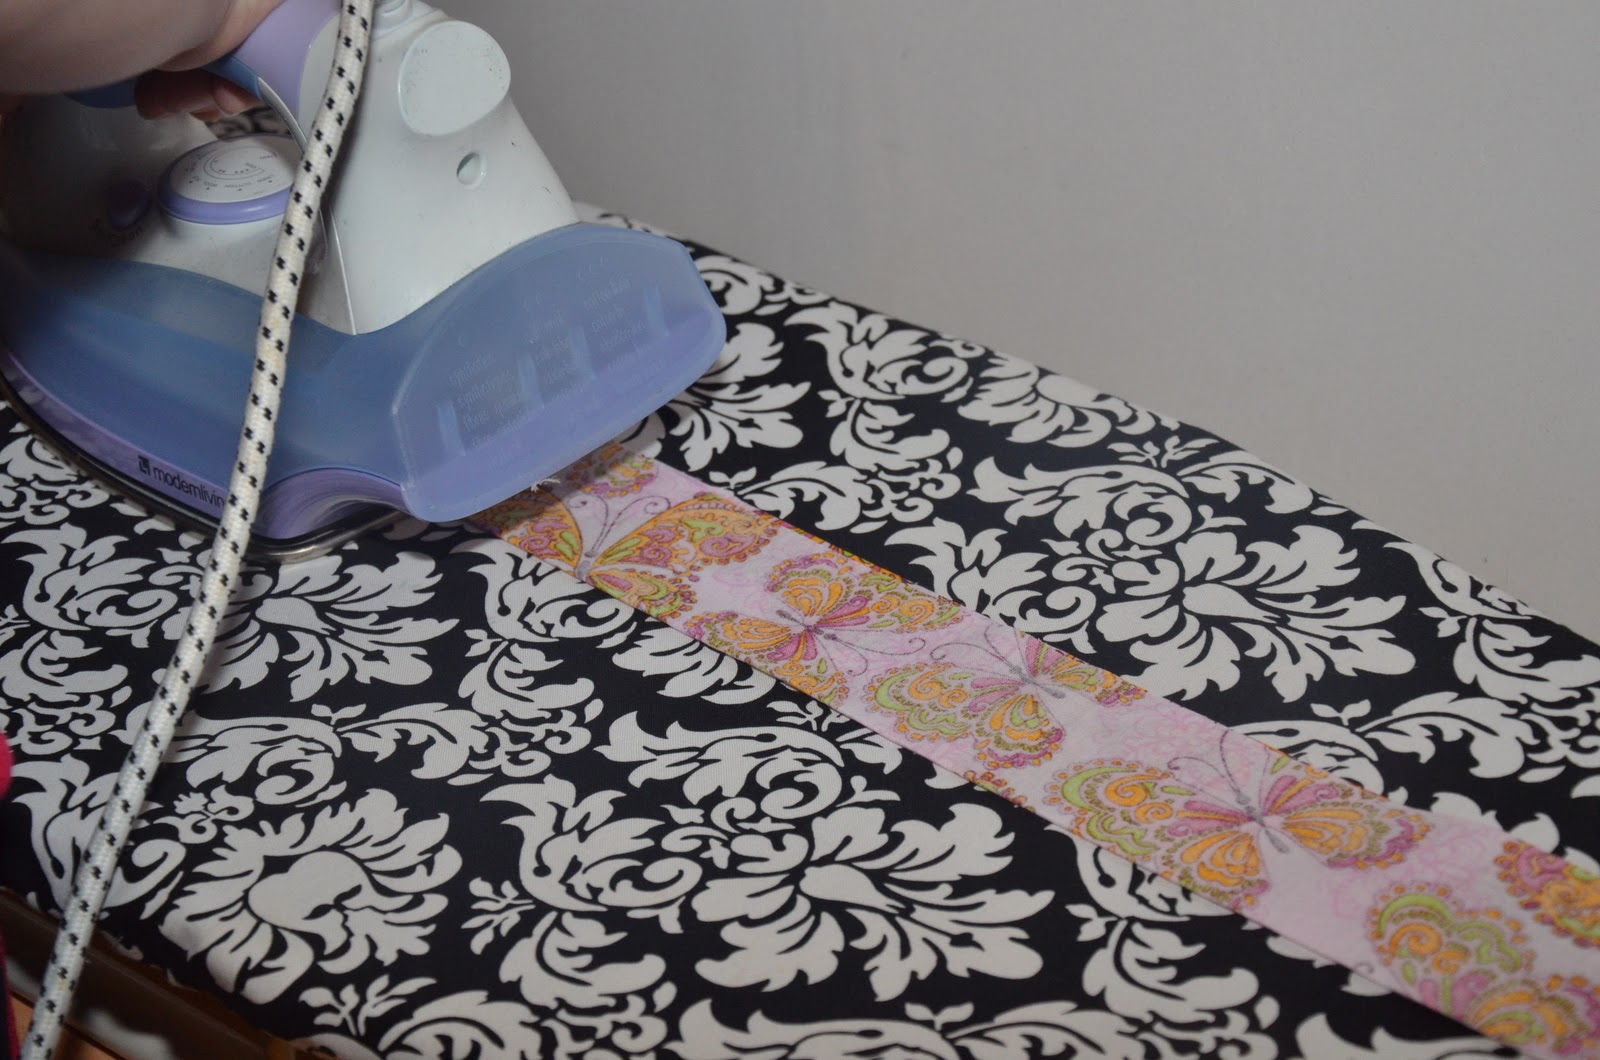
Once turned, Iron it flat again, sew the ends closed and thread through the casing on the dress


Repeat this step to make a second strap.
Step 10:
Then tie your straps together to make two big beautiful bows and your dress is finished!

I have made this dress quite wide (I used the whole width of the fabric) so when the little girl who receives this dress grows up, she can wear it as a top!
I hope this makes sense!
And of course if you can’t sew, I am also accepting donations of fabric and money :-) please email me at millyandmummy@gmail.com if you would like to donate!
Thanks to my wonderful hubby who sat with me while I was sewing and took all these awesome photo's for me! xxxx
Good on you...great idea...I'll see what I can get up too in the coming weeks/month.
ReplyDeleteLove it! I'll definitely try to get at least one dress made for you although I may not be able to make it to the sewing bee.
ReplyDeletecan I ask where everyone places the label on their dresses :)
ReplyDelete